How to Send Documents for Signature
In this article
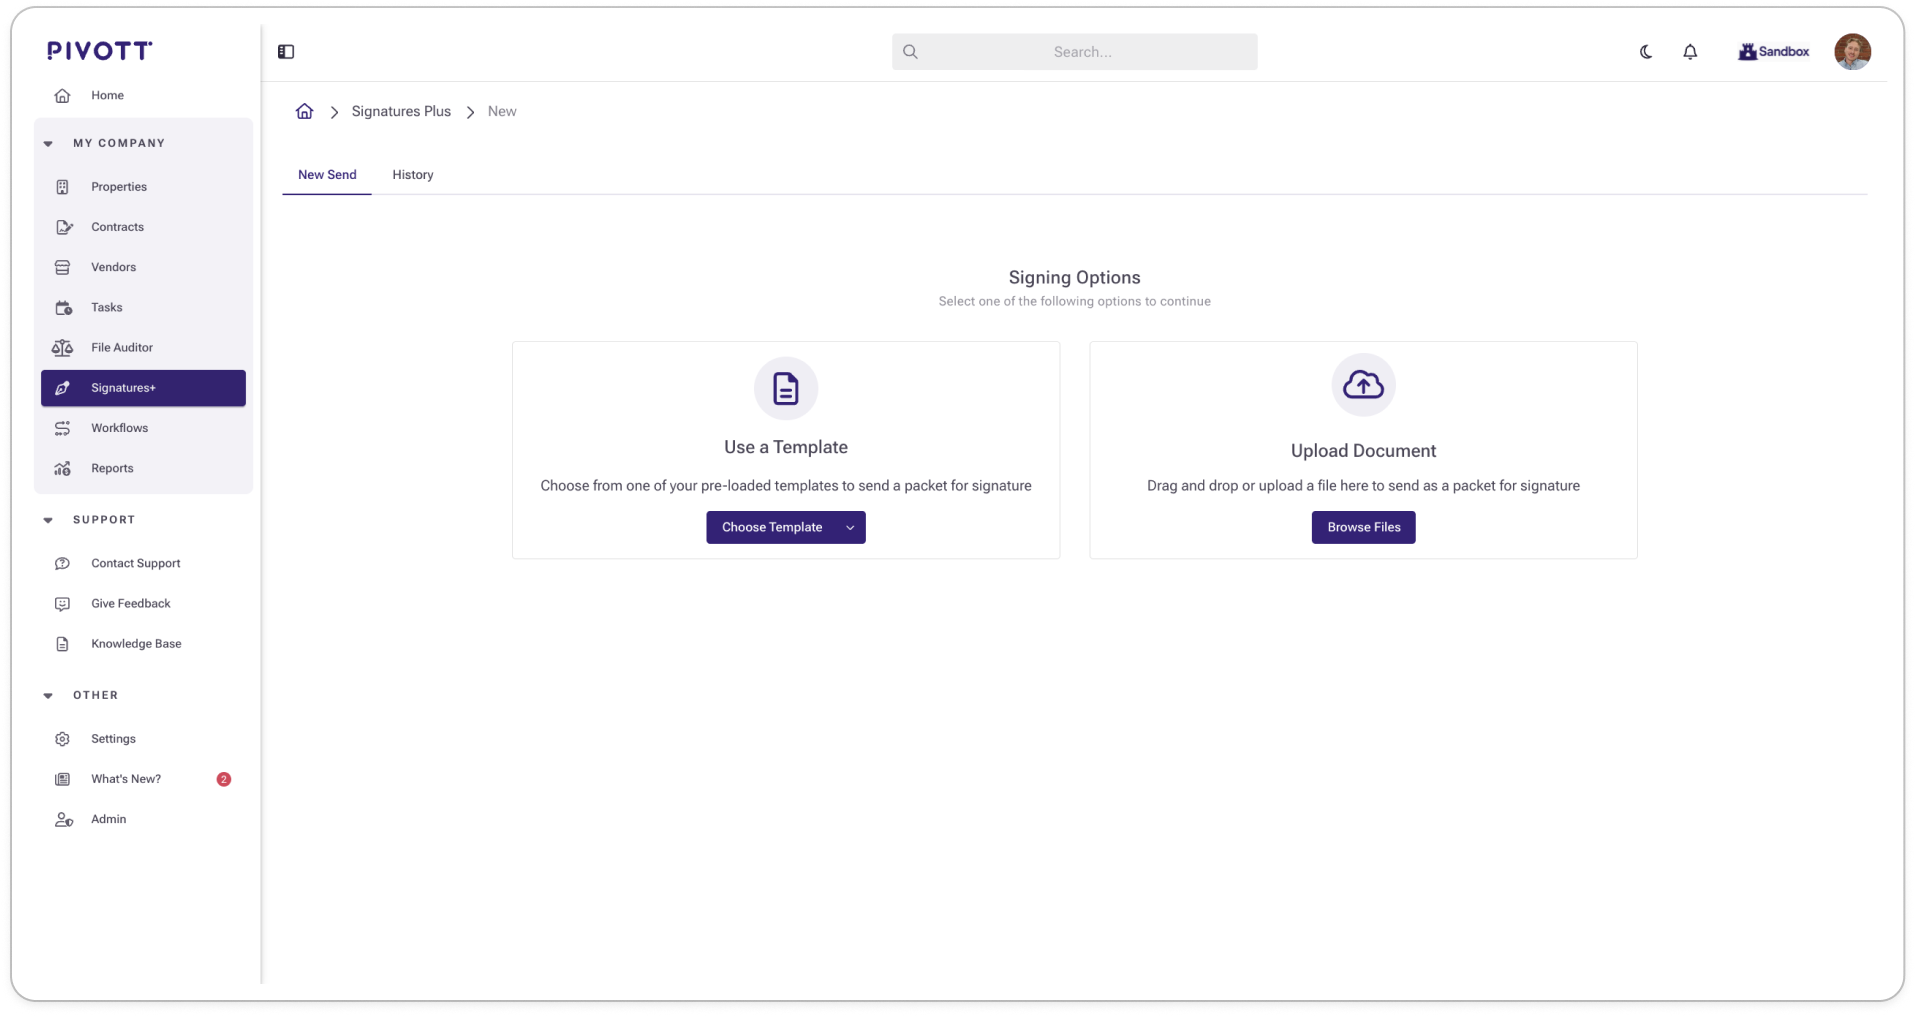
Getting Started
Enterprise customers can choose to begin with a template or upload a file to start from scratch.
- Click Signatures or Signatures+ in the main menu
- Choose a Template or Upload a file
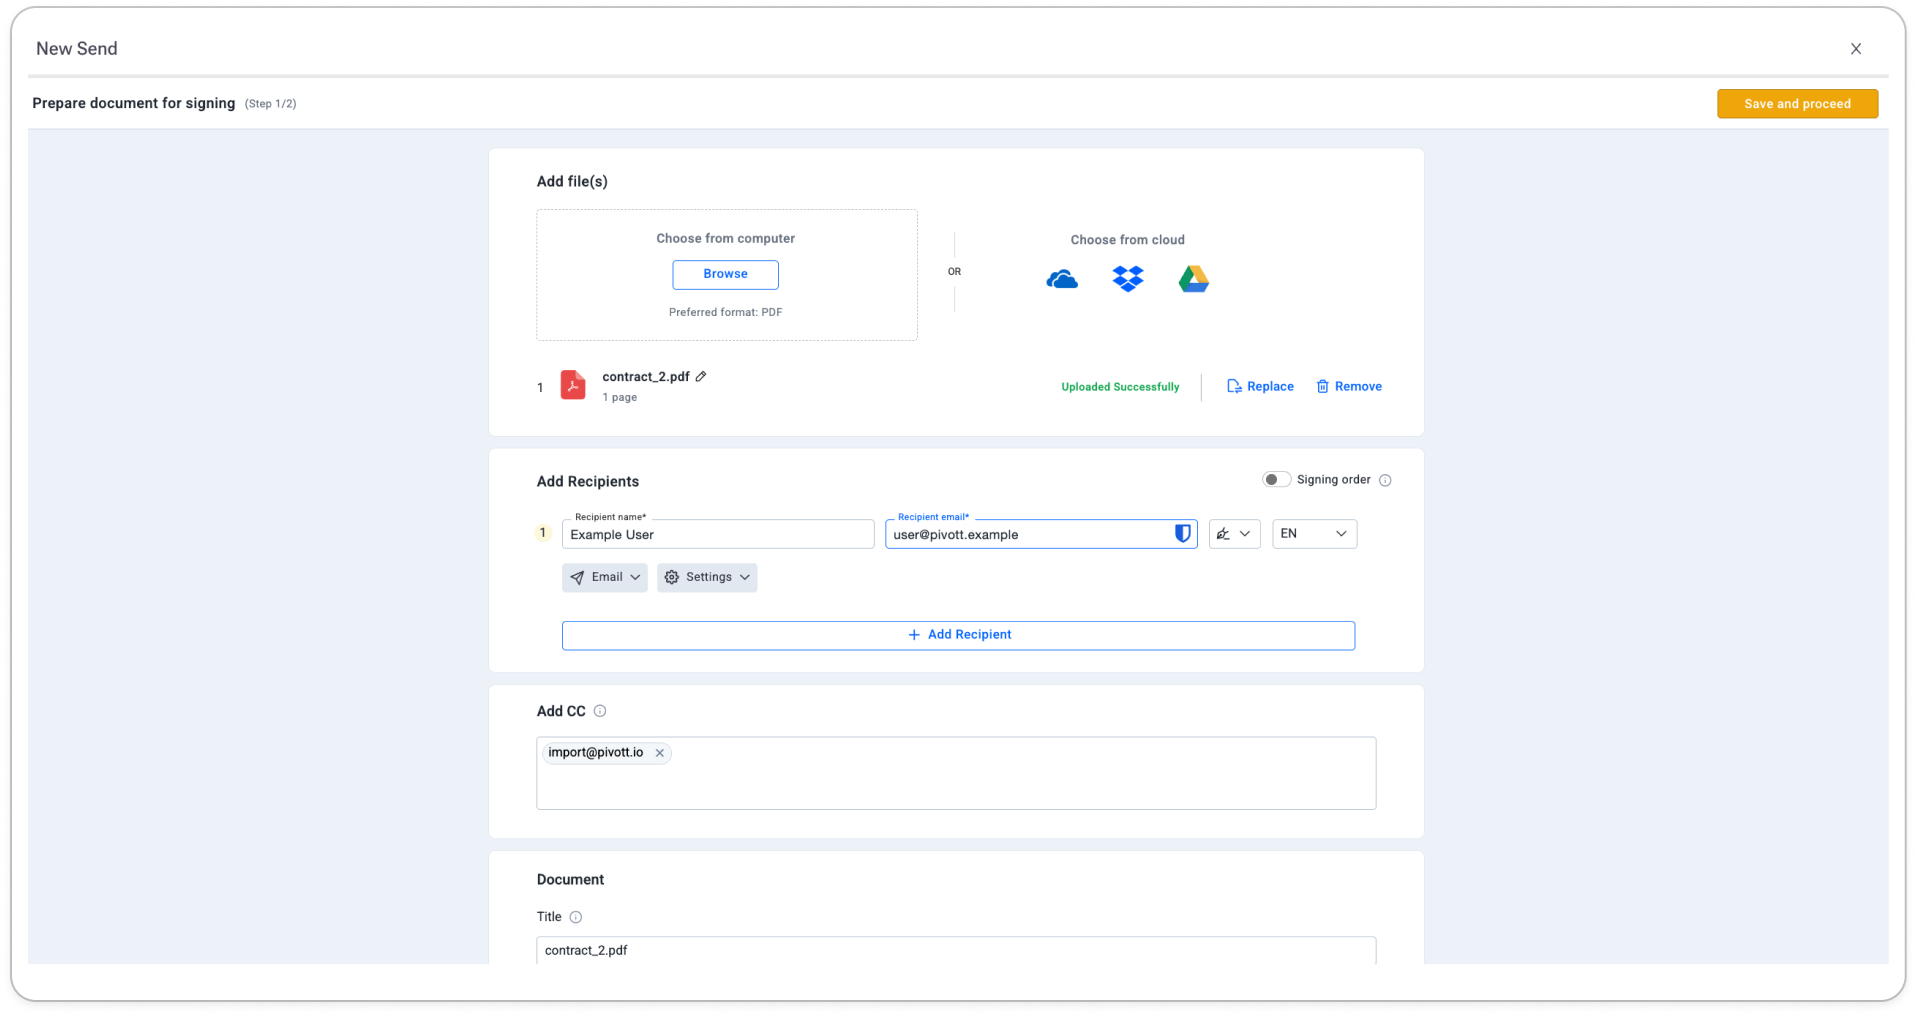
Step 1: Document & Recipients
Choose your document and recipients.
Required Fields:
- 1 or more documents
- PDF is highly recommended. Other file types may lose formatting
- 1 or more recipients
- Include yourself if you also need to sign
- If you are not a signer but would like to receive email notifications and a copy of the completed, signed document, you must add yourself as a CC recipient
- Enable signing order if someone (like you) needs to sign before others
- Use Reviewers to allow someone to approve (via an "Approve" button) without adding a signature—ideal for internal checks
- Use CC (optional, located below recipients)
- Do not remove "import@pivott.io" from CC if added
Important: If signers are required to upload additional documents during the signing process, do not use the "In-person signer" option.
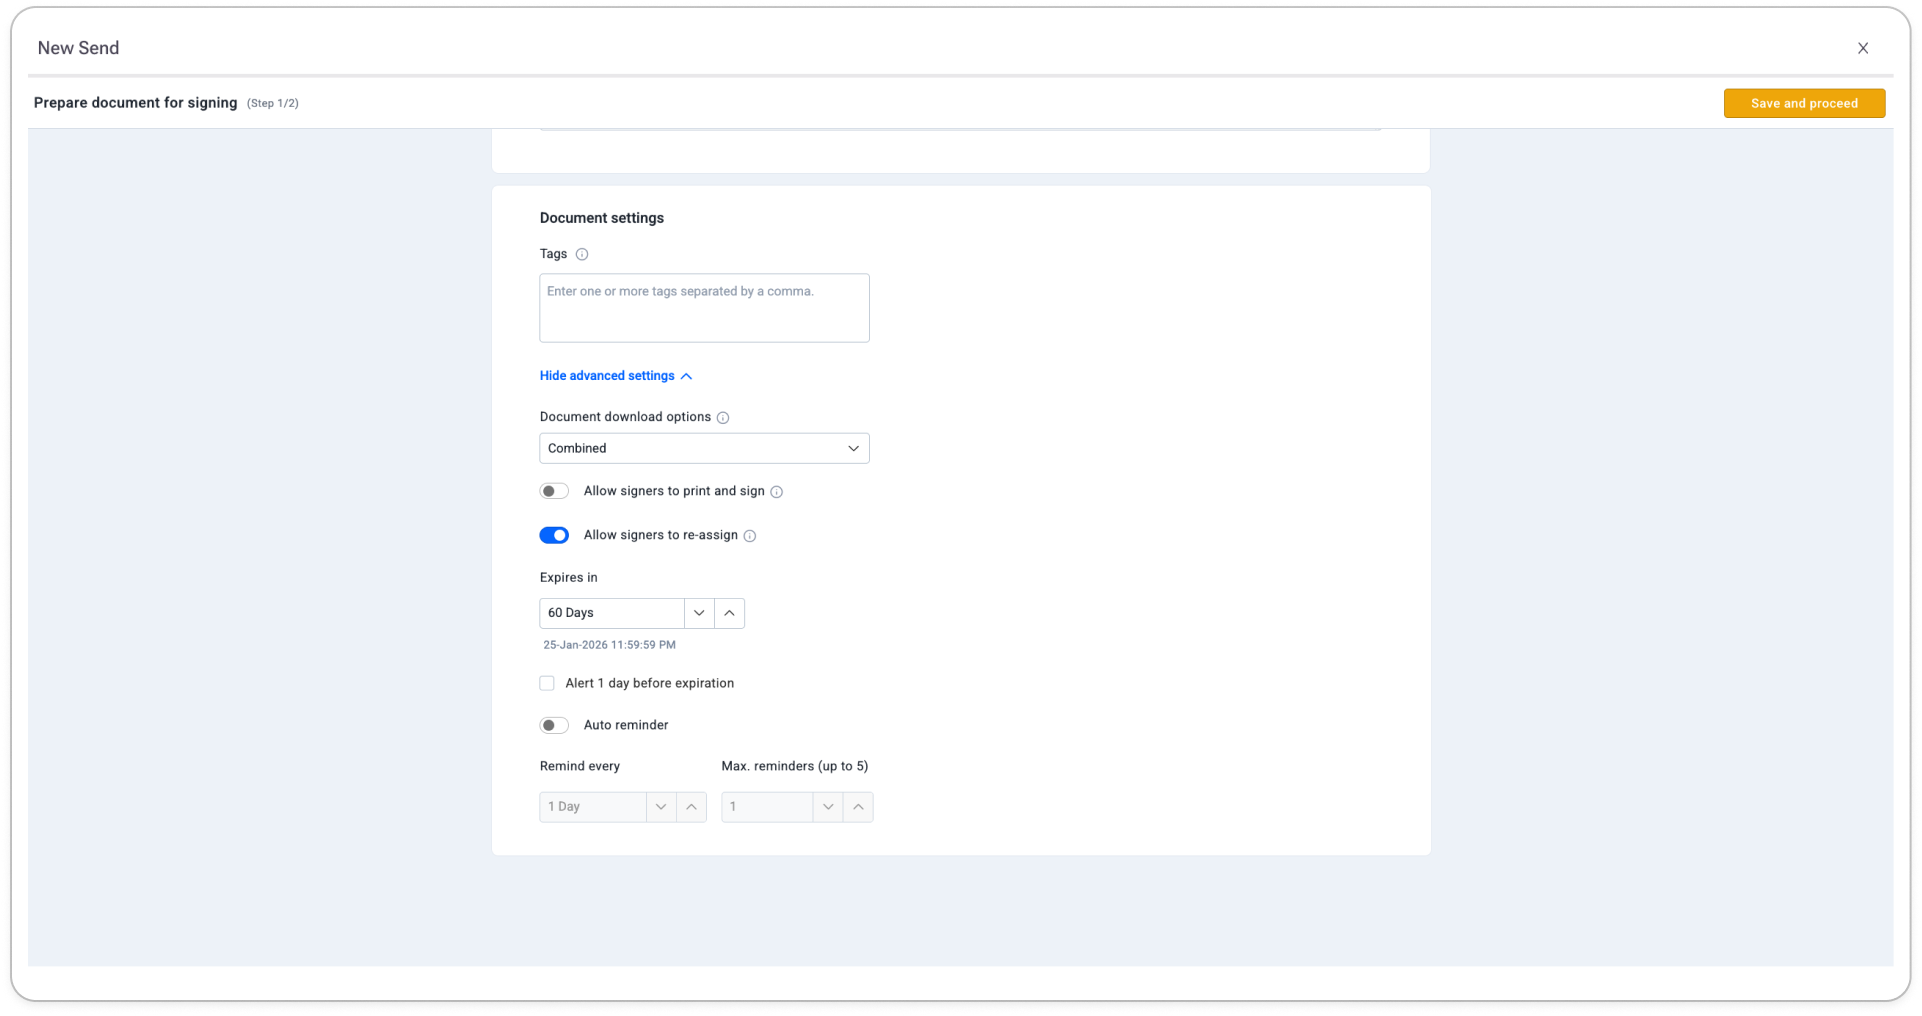
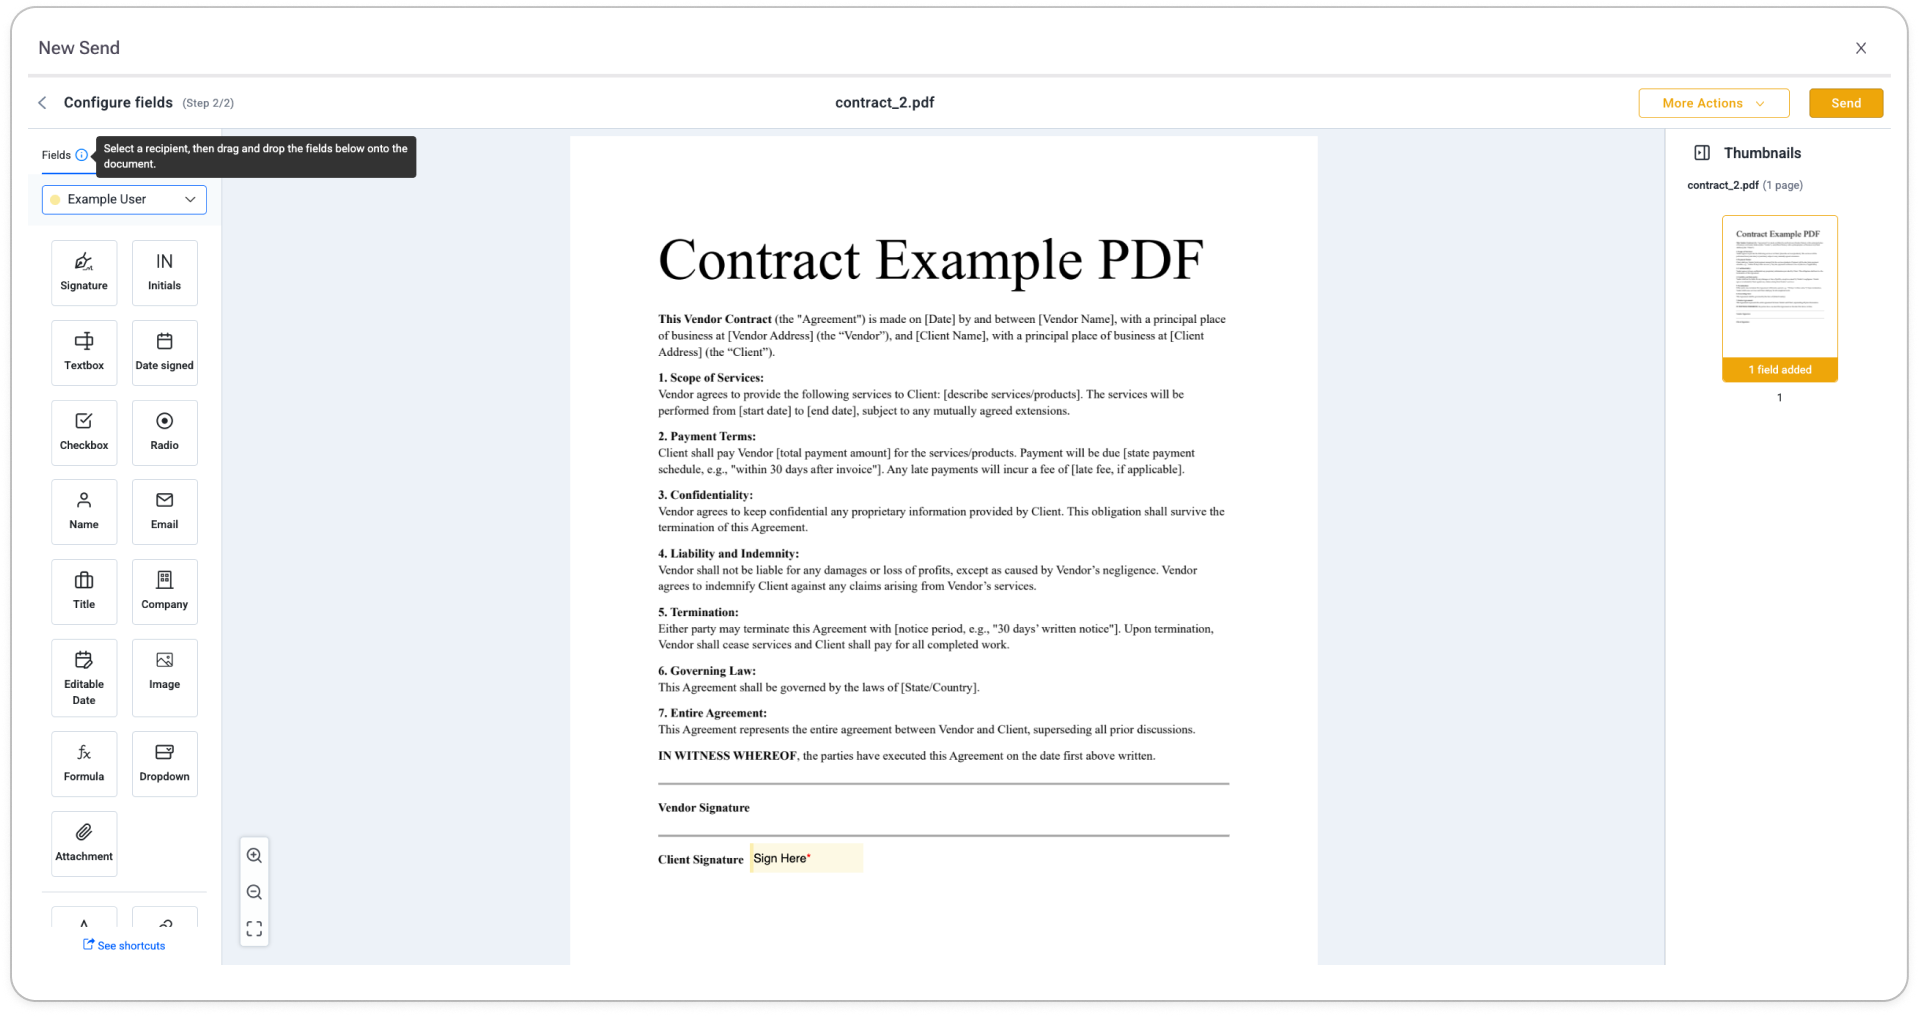
Step 2: Prepare Document
Customize or confirm how the document will be filled out and signed.
For each signer:
- Select the signer
- Add fields for that signer
- Mark fields as required if needed
- Optionally, insert default text
When you're done, click Send
Step 3: Understanding Notifications
Senders will receive the following notifications:
- Receiving a document to sign or approve (if they are a signer)
- Reminders of documents they need to sign (if they are a signer)
- A notice when the document has been completed by all recipients
- Includes a PDF attachment of the signed document(s)
Recipients will receive the following notifications:
- Receiving a document to sign or approve
- Reminders of documents they need to sign (as set by senders)
- A notice when the document has been completed by all recipients
- Includes a PDF attachment of the signed document(s)
CC'ed addresses will receive the following notifications:
- New signing requests have been sent out
- Recipient(s) decline to sign or approve
- Sender revokes the document
- Recipient reassigns a document
- Document has expired
- Sender deleted the document
- A notice when the document has been completed by all recipients
- Includes a PDF attachment of the signed document(s)